 钜亮五金-精密五轴数控加工服务


24H咨询热线:
180-2756-7310













定制服务热线
180-2756-7310

专业服务、快速报价
提供建模、免费改模
质量问题、免费重做
顺丰包邮、可开专票
CNC milling skills for beginners
发表时间: 2025-09-03 00:41:03
作者: 东莞市钜亮五金科技有限公司
浏览:
Navigate your first step in CNC milling: Basic tips for success
So you decided to dig deep into the precise and interesting world of CNC milling. Whether you’re an amateur who builds a garage shop, engineers make an idea, or businesses that want to bring the design to life, the initial steps of CNC machining can be exciting and incredible. Milling transforms digital design into tangible metal or plastic parts with incredible accuracy, but achieving these perfect results always requires understanding some core principles, not just pressing “start.”
This guide extracts key beginner tips collected from machining tides to help you avoid common pitfalls and get you stuck on the path of milling.
1. Main Material Selection - Start simple, expand:
While the possibilities seem endless (aluminum, steel, titanium, plastic, composite), Resist the urge to jump straight into exotic or superhard materials. Your learning curve will be smoother Softer, more processable metals such as 6061-T6 aluminum or free-cut brass. These materials are:
- More tolerant: Not very prone to vibration and tool breakage.
- Easier tools: Extend the life of expensive cutters when learning tool paths and speeds/feeds.
- More predictable: The behavior is well documented to make it easier to solve the problem. Remember: Gremphiem is thriving in processing almost any metal alloy - letting experts initially deal with high temperature alloys or hardened steels.
2. CAD/CAD models and cam preparation are important - garbage in, garbage output:
- Watertight geometric shapes are not negotiable: Your 3D model (or 2D geometry for 2.5D work) must be clean. Check for notches, overlapping surfaces, non-Manver edges and inverted normals. Software does not magically fix basic flaws.
- Design for Manufacturing (DFM) begins now: When you design or receive a design, please keep asking: Can this function be actually processed?
- Avoid unnecessary complexity: Can a simpler design achieve 90% of functionality?
- Consider accessing tools: Can standard end mills reach all required areas? Undercutting usually requires specialized tools or multi-axis machining.
- Radius issue: Sharp interior angles are impossible; specify realistic angular radii larger than the tool radius.
- CAM programming selection decision result:
- Choose the correct strategy: It is crucial to understand roughness (efficiently eliminating large amounts of material), finishing (to achieve the final dimension/surface), and specific strategies (contour, pocket, drilling, adaptive clearance).
- Orders on the tool path are strategic: Logical Sequence Operation - Drilling features that may be disturbing before completion.
- Simulation, simulation, simulation! Run a powerful cam simulation before cutting any metal. Visualize tool paths, check collisions (machines, tool holders, fixtures, parts), and verify inventory material removal rates.
3. Know your tools - the cutting-edge:
- End Mill configuration file: Learn about flute counting (2 rolls for softer materials/slots, 3 rolls of versatile, 4 curls for finishing hard materials), helical angle, cut length (LOC) and within reach. Shorter tools = more rigid = better results.
- Material-specific tools: Different coatings and geometry are optimized for aluminum and steel and plastic.
- Sharpening tool recognition: Learn about visual signs of a blunt or damaged tool - debris edges, built-in edges (bue), excessive wear on the flange. Dull tools damage the finish, increase cutting force, risk damage to parts, and cause catastrophic damage.
4. The Art and Science of Labor:
- Rigidity is everything: The workpiece must be fixed Absolutely. Any movement can lead to tremor, poor results, inaccurate dimensions and even dangerous failures.
- Matching fixtures and working: Vises (like Kurt style) are common. Consider step fixtures, switch clips, custom fixtures or sticky ones tailored to specific parts of complex geometry. Vacuum tray is perfect for sheets/sheets.
- Know your stock: If you refer to the chin of a machine table or vise, make sure the raw materials are flat and parallel. If not sure, mill the first face.
5. Decoding speed and feeding - the core of processing:
- Not just numbers: The spindle speed (rpm-speed at which the tool rotates) and feed rate (IPM/IPR-speed at which the tool moves through the material) are interdependent with specific materials and materials/tools. It's OK to start with a general chart, but expect to listen.
- Respect the chip load: This is the thickness of every tip-point removal of material for every revolution. Too low? Tool friction, overheating, fast and dull. Too high? The tool deflects, breaks, and has poor effect. Consistent calculation.
- Depth of cutting (DOC) and width of cutting (WOC): The axial DOC is the tool that tends toward depth radially each time through the radial direction. Radial Doc (Stepover) is how horizontally it participates. Balances aggressiveness with rigidity and tool strength.
- Begin conservative and optimized: Start with manufacturer's advice or conservative online calculator output, suitable for your specific tool/material. Increases and increases while monitoring sound, vibration and tool status. Complex CAM software and five-axis machines (such as Greatlight's machines) will dynamically optimize these parameters for maximum efficiency and tool life.
6. Correct Cut-Coolant/Luction & Chip Management:
- Do not cut (usually): Especially for metals, effective cooling and lubrication are crucial. it:
- Dissipate heat (prevent tool/workpiece damage).
- Reduce friction and tool wear.
- Efficiently evacuate the chip.
- Choose your coolant strategy: Flood coolant (most common), mist coolant (minimum lubrication) or compressed air (for some plastics/composites). Choose according to the material and operation.
- The chip must be evacuated: The stacked chips are catastrophic in your work or tool. Optimize chip evacuation, using compressed air explosion or program periodic retraction to clean the tool path in deep bags. The filter on the coolant system is crucial.
7. Note the machine - Setup and maintenance:
- Safe and drag vis/labor: Make sure it is parallel to the machine axis and is tightly bolted.
- Tool Length Offset (TLO): Accurate measurement tool in the machine's preset/touch probe. The error here causes a crash or the part is cut too deep/shallowly.
- Working coordinate system (WCS) settings: Precisely build the X, Y, Z zero points of your parts. Use an edge finder, detector or be careful of the edge. Double check your offset!
- Detection is your friend: If your computer has a detector (or you can use), use it to set up WCS, check center, or verification features. Save a lot of time and reduce human error.
- Maintenance matters: Keep the machine clean, lubricated and calibrated. Check the spindle to be beating regularly. Neglected machines cannot maintain accuracy.
Beginners' priorities: security, simplicity, iteration
- Safety first always: CNC machines have huge power. Wear proper PPE (safety glasses, hearing protection, no loose clothing/gloves near the spindle). Understand the emergency stop. During initial cutting, do not leave the treadmill unattended.
- Start with a validated model: Cut out simple, known shapes (cubes, circles) before solving complex parts. Verify that the dimension matches the expectations.
- Expect and learn from failure: The parts will be abolished. The tool will break. This is part of the learning curve. Analyze what went wrong (labor? Speed/feed? Programming error? Dull tool?) and make adjustments.
- Don't be afraid to slow down: It is wise to sacrifice reliability and learning cycle time. Speed has experience and confidence.
Conclusion: Establish an accurate foundation
CNC milling is a powerful fusion of engineering, software and craftsman-like skills. The journey from beginner to proficiency starts with focusing on these fundamentals: meticulous planning and modeling (CAD/CAM), understanding your tools and how they interact with materials, mastering the critical balance of labor and speed and feed, and respecting the machine itself with precise setup and maintenance.
While initial investments in learning and setting may be important, the ability to turn complex digital designs into high-precision, repeatable physical parts is incredible. However, for mission-critical components, tightly tolerated requirements, complex geometry requiring multi-axis functionality or projects requiring rapid and reliable machining of various materials, working with experienced manufacturers Great It is a strategic choice.
and State-of-the-art five-axis CNC equipment and deep manufacturing expertiseGreatlight effectively handles projects that may be overwhelmed to ensure quality, accuracy and timely delivery. Whether it’s a single prototype or across production volumes of different materials (aluminum alloys, stainless steel, titanium, engineering plastics), their one-stop solution includes machining, finishing and finishing – providing you with professionally made components that allow you to focus on design and innovation. Let Greatlight bring your most challenging precise machining concepts to life.
CNC Milling FAQ
Question 1: What tolerances can CNC milling actually achieve?
A: Achievable tolerances depend to a large extent on the size, geometry, material and machine capabilities of the part. For standard production milling in experienced stores like Greatlime, ±0.005 inches (±0.127mm) is very common and achievable. With greater caution, specific processes and advanced equipment (such as our five-axis machine), Tolerance is ±0.001 inches (±0.025mm) or even tighter For key features. Always discuss your specific tolerance requirements in advance to ensure they are consistent with the design and manufacturing process.
Q2: What materials can you machine?
A: We focus on processing various materials. Ordinary metal include:
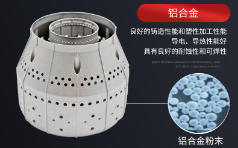
- Aluminum alloy (e.g., 6061 -T6, 7075, 2024 - Great for prototypes and components)
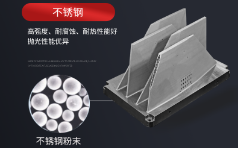
- Stainless steel (e.g. 303, 304/L, 316/L, 17-4PH - for corrosion resistance and strength)
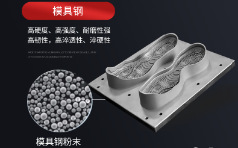
- steel (For example, carbon steel (1018, A36), tool steel, alloy steel (4140, 4340))
- Brass and copper alloys (Egg, C360, C110)
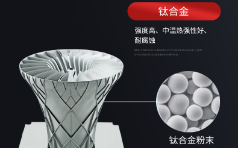
- Titanium alloy (For example, level 2, level 5 (TI-6AL-4V))
- Exotic alloys (e.g., Inconel, Hastelloy, Kovar) - Specialized knowledge is usually required.
We have also processed a lot Engineering Plastics (Delrin/Acetal, Peek, Eutem, Nylon, Ptfe/Teflon®) and Composite materials. If you are unsure of the specific material, please ask!
Q3: How to get a quote for the custom CNC machining part?
A: Getting a quote is very simple:
- Provide detailed CAD files: Usually a step (.stp, .step) or Igs (.igs, .iges) file. Parasolid (.x_t, .x_b) also works very well. 2D drawings (PDF or DWG/DXF) are also required to have clear dimensions, especially if they contain GD&T annotations or key notes that are not fully conveyed in the 3D model.
- Specify your requirements:
- Material type and grade.
- Required quantity (prototype, low capacity, production).
- Critical dimensions, surface finishes and required tolerances.
- Any necessary post-treatment (e.g., anodizing, electroplating, painting, heat treatment).
- Preferred delivery time.
- submit: Send your documents and information through our website quotation request form, or contact our sales team directly. Our engineers will review the design (usually provide DFM feedback), calculate costs and provide competitive quotes, usually within 1-2 business days.
Question 4: Five-axis machining is mentioned. How is it different and why do I need it?
A: Traditional 3-axis mills move cutting tools along X, Y and Z linear axes. Five-axis CNC milling adds two rotation axes (usually A+B or B+C), allowing the cutting tool to actually get close to the workpiece from the workpiece any Direction in a single setting. supply:
- Complex geometric shapes: Processing complex contours, undercuts, organic shapes and composite angles would otherwise be impossible.
- Production in a single setup: Lower processing, improve accuracy (no repositioning error), and significantly reduce lead time.
- Top surface finish: Optimal tool orientation minimizes scallops and improves finish on complex surfaces.
- Shorter tools: By allowing the use of shorter tools, rigidity can be improved with better access, reduced vibration and deflection.
Greatlight utilizes advanced five-axis technology to effectively and accurately solve challenging partial geometry.
Q5: What kind of post-treatment/surface finishing service do you provide?
A: We provide comprehensive post-processing to meet various functional and aesthetic requirements of metal parts:
- Metal finish: Anodized (type II, type III/hard coating, color), electroplating (nickel, zinc, chromium, nickel plating), passivation (stainless steel).
- coating: Powder coating, PVD coating, Teflon coating.
- Mechanical finish: Bead blasting/grinding, vibrating tumbling/polishing, brushing.
- Heat treatment: Reduce stress, annealing, hardening and backtempering.
- other: Screen printing, laser marking/engraving, burrs.
Specify the required finish during the citation process and we will ensure that it is seamlessly integrated into the production stream. We deal with it as part of a one-stop solution. Ready to learn how to transform your design into the greatness of precise reality?

点击右上角
分享给朋友吧







 长按图片保存/分享
0